Monday, May 25, 2015

Sneak Peek: Sprinkles of Life

Hooray! It's getting close! The brand new 2015-2016 Stampin' Up! catalog will be released to the public on June 2, and I can't wait to get my hands on a bunch of the fabulous new stamps, papers, and supplies... not to mention the new In Colors! I think I can safely say that the new catalog will knock your socks off!

To be honest, I already have my new In Color stamp sets, markers, cardstock, and reinkers as well as several other items that we as demonstrators were allowed to preorder. (I love being a demo!) Last night I made some time to play with a few of my new toys.

The stamp set I used is called Sprinkles of Life, and it's the new Ronald McDonald House charities set. This means that portion of the proceeds from sales of this set goes towards supporting this worthy cause. While this year's Flamingo Lingo set is cute (and available through June 2), Stampin' Up! really pulled out the stops on Sprinkles of Life! The 22-stamp set has a coordinating Tree Builder punch as well as designer papers that work super well with it.

The Tree Builder punch cuts out more than just the matching tree trunk stamp. It also cuts the leaves, and this same shape can be used as clouds, cupcake tops, and ice cream scoops -- like this:
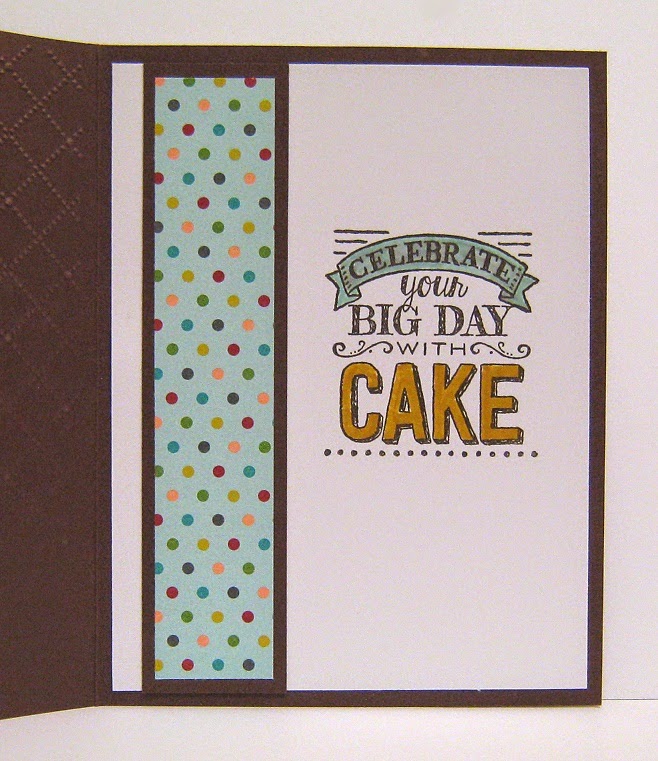


Inside of card:


The punch also cuts shapes for an apple/cherry, a small bird, little blossoms, and leaves/raindrops. I think this is the most flexible punch I've ever seen!

When I saw a card sketch by Allison Cope over on StampNation this week, I knew I would have to use it on my next card. The papers I chose to work with are from the Cherry on Top stack which reminds me a lot of Mary Engelbreit's bright and cheery artistic style. There's a matching set of five Cherry on Top washi tapes as well.

You can see two of the new In Colors in this card. The lighter green lined design on the left section of the card is Cucumber Crush, and the red at the top is Watermelon Wonder. The new In Colors not shown are Delightful Dijon (similar to the retired More Mustard), Mint Macaron, and Tip Top Taupe.

I'm tickled pink that I had some time to do some stamping this weekend, and I'm hoping I can play some more this week. There's a number of products with a beautiful, rich Bohemian theme, and that's what I plan to work with next.

Big Smiles,
Joyce Spear / StamperJoyce
          

Sunday, May 17, 2015

My Sew You Paper Pumpkin!

I can't sew. Sewing machines hate me, and I don't have the patience for embroidery or even for the cross-stitching I used to enjoy. These days my fingers aren't quite so quick to do what I tell them to and my eyes try to tell me everything's getting smaller. As I tore into the My Paper Pumpkin kit that came from Stampin' Up! in March, I groaned when I saw that there would be sewing involved in the project. 

I unsubscribed from My Paper Pumpkin awhile back after being disappointed with the projects being sent. SU! has since gotten its act together, and these days the kits are looking pretty good. The projects are more attractive, have more variety, and you can make more with the supplies that are sent. They also offer refill kits to subscribers, so if there's a project that you really like, you can make even more. I learned, too, that the color of ink spots that come with the kits each month are not repeated within a year, so it's a handy way of collecting ink colors you may not have. I was most enticed to sign up for My Paper Pumpkin again by the unique stamps offered each month, though.

As I pulled out the sewing needle and yellow embroidery thread from the red-orange box, I cringed. Was I going to regret re-subscribing? As it turns out, I absolutely LOVED the kit!! Included were nine black and white notecards with Pool Party envelopes and epoxy stickers, plus nine white die-cut speech bubbles with holes spelling out the world YOU, plus a bunch of Stampin' Dimensionals (foam adhesive) to adhere the speech bubbles to the cards with. 

Here's how the cards were designed to look:

Card 1 -

Of course I had to use the other stamps in the kit to jazz up the inside of my card, too:


After sewing the first card, I realized it wasn't so bad. The needle had a big eye and was easy to thread, and the holes were large enough that I didn't have to squint to see what I was doing. I decided to sew the remaining eight cards as well. I saw that lots of people used markers to draw in the lines where the thread was designed to go, but I found the sewing rather therapeutic. 

As charming as that first card was, I chose to add in some additional supplies to complete the rest of the cards. I pulled out some Pool Party, Whisper White, Daffodil Delight, and Basic Black cardstock, some stitched dies, and some other decorative elements. Here's the result:

Card 2 -

Card 3 -

After making three notecards, I decided to cut the notecards in half and use the front and back as panels on separate A2 cards. By doing this, I will be able to create six additional cards.

Card 4 -


Card 5 -


Card 6 -


Card 7 -


Card 8 -


Card 9 -


Notice the perfectly aligned little yellow stars on the inside of Card 1?  I used my MISTI to stamp each star separately, and used grid paper to space them out. I do so love my MISTI! Today little stars, tomorrow the world!!

* * * * * * * * * * * *
I'm excited to say that I'm caught up on blogging my finished cards, which means it's time to get back to stamping and making more projects to show! WooHoo! I have high hopes of finishing up some cards yet this weekend, so hopefully you'll be seeing another post from me in a day or two.

Thanks for visiting, and I hope you enjoy what you see here!

Big Smiles,
Joyce Spear / StamperJoyce
         

Friday, May 15, 2015

A Little This, a Little That

Amazingly, I'm nearly caught up with posting my cards from the last few months. I have a few odd cards to show you today, and then my next post will be cards from a recent My Paper Pumpkin kit which, as anyone who knows me knows, will not be made exactly as directed. (Yup, I have to put my own spin on things!)

Card 1: I'm starting today with one of my favorite cards, both to make and because of how well it turned out. I made about twenty (give or take) of this card for a StampNation swap in February/March. The swap was a Tic Tac Toe, meaning we had a grid of supplies and techniques, and our instructions were to pick a row across, down, or diagonally and incorporate all three of those into one card. My elements were Banner, Patterned Paper, and Hearts. I had just gotten my Butterflies thinlits from Stampin' Up! and was itching to use them, so of course I had to use a butterfly, too. Despite knowing what I wanted to work with, the card design eluded me until just before the deadline, so I ended up making these quickly in the wee hours of the morning.


The banners were cut with the Banner thinlits from Stampin' Up!, and there's a vellum cardstock layer over the print from the Painted Blooms DSP. All blue and yellow card edges are sponged, giving the card a depth that I couldn't really capture in the photos. The embossing on the yellow panel was done with the only non-SU! supply I used besides vellum adhesive. The small hearts were made with a retired punch. The white heat-embossed sentiment is from the Crazy About You set in the current Occasions catalog.


I kept the inside simple, and managed to find time to stamp up the envelopes with the Painted Petals photopolymer set.

Card 2: This sweet card features the Kind Koala stamp from Stampin' Up!'s big catalog. It was the first card I used my MISTI stamp tool to create; the MISTI enabled me to both get a clean image of the koala with perfect overstamping, and made lining up the diagonal accent a snap. (If you haven't heard of this tool, look it up! It's a fabulous tool that most stampers could benefit from using!) 


I made this card for a StampNation sketch challenge. The challenge made my brain work overtime, but I'm glad I participated.


Card 3: I had plans to jump into a game of card tag on StampNation after being inspired by a card that featured rays of sunshine created with a stamp. I was trying to remember a technique I had seen to create the rays with alternating papers, and ended up finding five ways to do it... and the next thing I knew, I had decided that I wanted to try all of those ways. (Talk about going off on a tangent!) This is the first card I finished -- because it was the easiest.


I have a substantial pile of partially-completed cards, and my goal now that I'm nearly caught up with my blogging is to finish off those cards so that I can start fresh with whatever catches my fancy. I'm also working on pulling together a batch of birthday cards for a friend, so I'll be doing birthday cards for awhile.

Remember, tomorrow is My Paper Pumpkin day! I hope you'll enjoy it!

Bright, Sunshiny Smiles,
Joyce Spear / StamperJoyce
            

Wednesday, May 13, 2015

Happy Birthday, StampNation!

Back in January, StampNation had a big birthday bash to celebrate being around for four years, and I had a blast doing the Birthday Challenges! The challenges, well, challenged me to make some birthday cards I otherwise wouldn't have.

Card 1: Happy Birthday to Her


Card 2: Happy Birthday to Him


Card 3: Happy Birthday to a Kid


Card 4: Happy Birthday Non-Traditional


Card 5: Happy Birthday for *Four* Years (incorporate 4 of something)


Card 6: Happy Birthday to Anyone


Card 7: Happy Birthday card CASEing a card by someone else


I was especially glad I participated because I won the drawing for the biggest of the sponsor prizes, a $50 gift certificate to Simon Says Stamp. How cool is that?

Anyway, if you have any questions about the cards above, just holler. I'm keeping this post brief so that I have time to take more photos of completed projects while there's still daylight.

Winning Smiles,
Joyce Spear / StamperJoyce
         

Tuesday, May 12, 2015

Valentines 2015

I don't usually get into sending Valentines Day cards, but this year I did -- thanks to all the inspiration on StampNation as well as some stamps and die cuts that landed in my lap and were screaming to be used.

This first batch was made with stamps sent as a gift along with my Whimsy Stamps order sometime in December or January. I'm not a huge fan of "cute" but this little kitty stole my heart. And I love the sayings that came with it: mon ami, mon amore, and j'taime (my friend, my love, and I love you).

I made six valentines with this set, all with the same gorgeous Designer Series Paper with gold foil throughout the design...

Card 1:


Card 2:


Card 3:

Card 4:


Card 5:


Card 6:

... but they all look different because each card uses a separate section of the printed paper, has different rub-ons along the top border of the front, and has a different ribbon embellishment in the tag. If I remember correctly, each of the kittens were colored just a little differently with Derwent Inktense watercolor pencils. I think these are some of my best cards, but the pictures just don't do them justice as the gold foil is lost in shadows.

* * * * * * * * * * * *

I had just sent these six cards off to my friends when I found out I needed to send some more valentines. Luckily my friend Charlene sent me six wonderful die cuts of the word LOVE, so I made six more cards:

Card 1:


The white panels on the front of each card are embossed with different embossing folders, which I think gives them each a different look.

Card 2:


Card 3:

Card 4:

If you're wondering what that thing hanging over the heart in LOVE is, it's a set of five tags stamped with teeny tiny words in black, red, and gold Delicata ink. They're hanging from gold pear pins.


And if you're wondering what a pear pin is, it's a safety pin in the shape of a pear:


Card 5:

Card 6:

* * * * * * * * * * * *

So there you have it, the one dozen Valentines Day cards I sent this year. (I'm so pleased with myself, lol.) If you are one of the recipients, please know that you are extra special to me! 

Let's see... Tomorrow's post will be birthday cards! I hope you'll stick around to enjoy them, as there's a lot more variety in tomorrow's cards than in the sets I posted today.

Smiles,
Joyce Spear / StamperJoyce