February 3rd was a great day for me because ordering opened up for the third of Catherine Pooler's Stamp of Approval collections, this time with a "Young at Heart" birthday theme. February 6th was even more exciting, though, because that's when my box arrived! I am absolutely over the moon with this set of goodies which I'm sure will be my go-to and and at least starting point for birthday cards for a long time to come. Included in the collection are (if I remember correctly) four stamp sets (SugarPea, CASual Fridays, and Winnie & Walter), three die sets, and a very versatile stencil - plus Catherine threw in a special party favor, a Spectrum Noir clear Sparkle pen that makes things, well, sparkle.
My first three cards are rather generic, but I had to start somewhere. I do plan to make some more personalized cards in the near future since I have some requests. My ultimate goal is to have a bunch of cards to put into my stash so that I'm ready to go whenever it's time to send birthday cards to my friends. I'm getting too old for last-minute scrambling!
So this first card was made minutes after opening my box:
I know it's rather simplistic, but I still think it's cute. Unfortunately the sparkle from the Spectrum Noir pen on the balloons and black letters doesn't show up in the photos, but in real life it really does add a bit of "specialness" to the card. I also did a quick pass of Shimmer Spritz that makes the whole card front look like fresh snow on a sunny day. Here's the inside:
On this second card, I did a bit of stenciling. Again, it's a very simple design, but I think it looks like a celebration. My colors for all these cards are Stampin' Up!'s Tempting Turquoise, Strawberry Slush, Crushed Curry, Cucumber Crisp, and Basic Black. I mixed things up a little by using a SU! balloon punch rather than the balloon die included in the SOA collection - but that's part of the joy of Catherine's collections, that they play well with other products.
Here's the inside, too. You'd think the die cut confetti would be a pain in the patootie to work with, but thanks to the recent gift of a Crystal Katana (thank you, Carey!), it was a breeze.
And here's my favorite of the three cards...
I just ADORE the crooky cake! It's so much fun to play with, and because of the coordinating stamps and dies, there are a million different ways to decorate it. Once again the Spectrum Noir Sparkle is hiding from the camera, but it is there on the candle flame as well as in the openings in the word CAKE. I decided to add a bit of background color with the included Harleen stencil, and used a sponge to blend some Tempting Turquoise and Crushed Curry together to get a pop of green. I kept the inside pretty simple:
I'm eager to make a bunch more cards with the supplies in the box, especially since there's a huge stamp set I haven't even broken the seal on yet! My goal for this weekend, though, is to make as many cards as I can using stencils so that I can enter them in the birthday challenges. Stay tuned to see how my plans turn out...
With a Smile and a Sparkle,
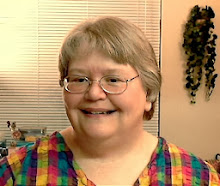
Joyce Spear, a.k.a. StamperJoyce
Saturday, February 20, 2016
Friday, February 19, 2016
A Happy Get Well Card
The son of one of my friends recently had eye surgery, and since he's a pretty cool kid I decided to make a get-well card for him. I learned that he likes cats and the color blue; and I knew I wanted to incorporate some stencil work into the design - so with all that decided, I forged ahead.
The desire to work with a stencil is related to the free class I've been following on StampNation. I love that this class is a gift to the members of StampNation to celebrate its fifth birthday. There are (so far) seventeen lessons and challenges, and every challenge entry is a chance to win one of a bunch of fabulous prizes from our sponsors. And now you know the real reason why I'm suddenly motivated to pull out my stencils. :)
Without further ado, here is the card...
Front:
Inside:
Close-ups: These are my best tries at capturing the stenciling that I did. I used translucent embossing paste with a bit of blue distress ink added to it, and pressed it through a stencil I had on hand.
Overall, I think the embossing paste has a really cool effect on this card, and I plan to use the medium more often!
Stamp sets/dies used: My Favorite Things "Cat-itude"; Simon Says Stamp "Playful Kittens"
------------------
Coming up next: Some pretty special birthday cards!
Big smiles,
Joyce Spear a.k.a. StamperJoyce
The desire to work with a stencil is related to the free class I've been following on StampNation. I love that this class is a gift to the members of StampNation to celebrate its fifth birthday. There are (so far) seventeen lessons and challenges, and every challenge entry is a chance to win one of a bunch of fabulous prizes from our sponsors. And now you know the real reason why I'm suddenly motivated to pull out my stencils. :)
Without further ado, here is the card...
Front:
Inside:
Close-ups: These are my best tries at capturing the stenciling that I did. I used translucent embossing paste with a bit of blue distress ink added to it, and pressed it through a stencil I had on hand.
Overall, I think the embossing paste has a really cool effect on this card, and I plan to use the medium more often!
Stamp sets/dies used: My Favorite Things "Cat-itude"; Simon Says Stamp "Playful Kittens"
------------------
Coming up next: Some pretty special birthday cards!
Big smiles,
Joyce Spear a.k.a. StamperJoyce
Friday, January 22, 2016
First Christmas Card for 2016
I was bored out of my mind while recuperating last week and desperately needed to make something while at the same time taking care to not stress my hands that are still healing from surgery. So, I thought to myself, what better time to pull out the January 2016 Flurries of Love kit from Simon Says Stamp?
This was a super easy card to make since the sentiment on the front is actually a page from the DSP included in the kit. There's a strip of silver glitter ribbon with a thinner strip of DSP centered on it, and the snowman is a sticker. I added a trio of snowflake sequins, brushed the heart with a clear Wink of Stella pen, and the front panel was done. I layered it onto a piece of Audrey Blue cardstock from the kit.
The inside was even easier! I used a strip of the same DSP on the card front, and stamped a greeting from Simon Says Stamp's Big Scripty Greetings - Holiday stamp set using Hero Arts' Ombre Lilac to Grape purple inkpad. (The ink matches the patterned paper much better in real life.) A few more sequins and the card was completed.
+ + + + + + + + + +
Thanks to a minor infection in my right hand, my surgeon says I need to slow down just a bit, so it may be another week before I try my hand at another card. With all of the ideas I have, it may take me that long to decide what to make next. :)
Smiles,
Joyce Spear a.k.a. StamperJoyce
This was a super easy card to make since the sentiment on the front is actually a page from the DSP included in the kit. There's a strip of silver glitter ribbon with a thinner strip of DSP centered on it, and the snowman is a sticker. I added a trio of snowflake sequins, brushed the heart with a clear Wink of Stella pen, and the front panel was done. I layered it onto a piece of Audrey Blue cardstock from the kit.
The inside was even easier! I used a strip of the same DSP on the card front, and stamped a greeting from Simon Says Stamp's Big Scripty Greetings - Holiday stamp set using Hero Arts' Ombre Lilac to Grape purple inkpad. (The ink matches the patterned paper much better in real life.) A few more sequins and the card was completed.
+ + + + + + + + + +
Thanks to a minor infection in my right hand, my surgeon says I need to slow down just a bit, so it may be another week before I try my hand at another card. With all of the ideas I have, it may take me that long to decide what to make next. :)
Smiles,
Joyce Spear a.k.a. StamperJoyce
Tuesday, January 12, 2016
"Mugs and Kisses" Thank You Cards
Since I'm not much of a gift-giver during the Christmas season, I don't expect to get Christmas presents from other people. Three of my dear friends caught me by surprise this year though, (waving to Carey, Cathy, and Debbie), so I was eager to do something special for their thank-you cards
I recently acquired a set of dies from My Favorite Things called LLD Hot Cocoa Mugs along with a coordinating stamp set called LLD Hug in a Mug - and they are adorable! See for yourself:
The card base is Crushed Curry, and the printed Rich Razzleberry layer is DSP from Stampin' Up!'s annual catalog called Bohemian. The rest of the card is pieces cut from the die set using Crushed Curry, Bermuda Bay, Whisper White, Real Red, and Chocolate Chip. I trimmed the ends of the sentiment piece using the Washi Label punch, also by SU!
I forgot to take pictures of the insides of the cards since they were all different (oops!), but each one said either "Warmest Thanks" or "You Warm My Heart" with either a stitched heart to coordinate with the ones on the mugs or stamped hearts from the stamp set. I added a strip of the same DSP I used on the front of the card for an accent piece.
I had SO much fun making these cards! I can hardly wait til I'm all healed up from my surgeries so I can play without pain or worries that I will be constantly dropping things (like inked stamps!).
Until that time, please sit tight and know that I'll be dreaming up cards and projects in my head that will WOW you in the months to come. I thank each and every one of you for visiting or subscribing to my humble blog!
Mugs and Kisses,
Joyce Spear a.k.a. StamperJoyce
Monday, January 11, 2016
Cathy's Cup of Clove Candy
I'm not much of a gift-giver during the winter holidays, but I did want to do something special for my dear friend Cathy. We try to get together every month or two for lunch, and every time she comes to pick me up she raids my candy dish for some of the old-fashioned clove candies that I keep on hand. It occurred to me that it might be nice to give her some of the candies for her to enjoy between our visits. I brainstormed over presentation, and was suddenly hit with an idea! What if, instead of giving her another dish to wash, I made a paper mug? I had seen one that a friend had made, so I asked her for the template and she sent me to YouTube. Here's how the project turned out:
The inside:
Isn't that darling? Here it is from a slightly different angle, where you can see the curved bottom of the cup:
The inside:
And the bottom:
And finally, here it is with the candy inside of it. So cute!
Next up: A series of thank-you cards I made for the folks that surprised me with gifties this year. You may want to make yourself some hot chocolate!
Sweet smiles,
Joyce Spear a.k.a. StamperJoyce
Sunday, January 10, 2016
Christmas Cards 2015
Now that the holiday festivities are over, I realized I'm overdue in showing the Christmas cards I made this year (well, technically last year)... so here goes!
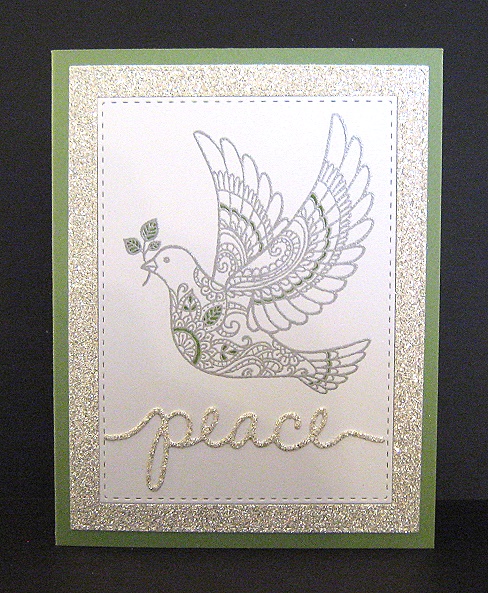
I used the Stampin' Up! single wood-mount stamp called Dove of Peace for these two cards:
I inlaid the stitched center layer into a frame of silver glimmer paper, and then layered the whole thing on a Wild Wasabi card base. I cut the word "peace" out of the same glimmer paper, stamped the dove with silver Delicata ink so it shines in real life, and then spot colored with a Wild Wasabi marker.
I did much of the same here, except I made the stitched frame from Old Olive cardstock and put it on a heavy Whisper White base. The bird is stamped in gold Delicata so it shimmers. Sweet and simple!
* * * * * * * * * *
Next up is a batch of cards I CASEd using the Stampin' Up! Sleigh Ride edgelits, glimmer paper, and Winter Wonderland specialty designer series paper.
On this card and the next, I used silver glimmer paper. On the first card I placed six clear gemstones around the sentiment, but I decided it was embellishment overload when combined with the three black candy dots.
I "fixed" the problem by using a stamped-off silver Delicata snowflake over the sentiment on the rest of the cards in this set.
I don't have as much Dazzling Diamonds glimmer paper as I do the silver, but I thought I'd give the DD a try anyway. Turns out I like it best!
* * * * * * * * * *
Finally, here are two cards I made flying by the seat of my pants using the Stampin' Up! Peaceful Pines stamp set and stuff that was just sitting on my desk. When I started I had no layout in mind, and no plan for which supplies to use. I like these the best of this year's cards!
I used two dies to cut out the tree on this second card: the outside frame and then a framelit that cuts cute little branches into the center of the tree. I forgot to be sure they were lifted up before I took the picture, but the effect is pretty cool.
Here's the inside of the card:
* * * * * * * * * *
I made a total of about eight cards this year, significantly less than I usually do, because I was struggling with carpel tunnel and pinched ulnar (elbow) nerves on both arms. At the time of this post, I've already had surgery on my left side and it is making a drastic improvement, and I await surgery on the right side with hopes that it will be equally successful. I'm told that the nerves in my hands and arms may take up to a year to regenerate, so I'm expecting to get a lot more done in 2016 with a lot less pain.
Up next: A small 3D project I made as a gift for a friend. I hope you'll be back to join me!
Warmest wishes to you for New Year! May it bring you much love, happiness, and creativity!
Smiles,
Joyce Spear, a.k.a. StamperJoyce
I used the Stampin' Up! single wood-mount stamp called Dove of Peace for these two cards:
I inlaid the stitched center layer into a frame of silver glimmer paper, and then layered the whole thing on a Wild Wasabi card base. I cut the word "peace" out of the same glimmer paper, stamped the dove with silver Delicata ink so it shines in real life, and then spot colored with a Wild Wasabi marker.
I did much of the same here, except I made the stitched frame from Old Olive cardstock and put it on a heavy Whisper White base. The bird is stamped in gold Delicata so it shimmers. Sweet and simple!
* * * * * * * * * *
Next up is a batch of cards I CASEd using the Stampin' Up! Sleigh Ride edgelits, glimmer paper, and Winter Wonderland specialty designer series paper.
On this card and the next, I used silver glimmer paper. On the first card I placed six clear gemstones around the sentiment, but I decided it was embellishment overload when combined with the three black candy dots.
I "fixed" the problem by using a stamped-off silver Delicata snowflake over the sentiment on the rest of the cards in this set.
I don't have as much Dazzling Diamonds glimmer paper as I do the silver, but I thought I'd give the DD a try anyway. Turns out I like it best!
* * * * * * * * * *
Finally, here are two cards I made flying by the seat of my pants using the Stampin' Up! Peaceful Pines stamp set and stuff that was just sitting on my desk. When I started I had no layout in mind, and no plan for which supplies to use. I like these the best of this year's cards!
I embossed the pine tree in silver and then cut out the tree and star using the coordinating framelits. The DSP layered on Night of Navy is Season of Cheer from the Holiday mini catalog. A few strategically placed panels, some rounded corners, and a little sponging on the edges, and voila'!
I had so much fun with the outside that I went on to make the inside festive as well. The three snowflakes are from the holiday Stamp of Approval collection.
I'm not sure whether I made the above card or the below one first, but I think they're equally eye-pleasing for different reasons.
I used two dies to cut out the tree on this second card: the outside frame and then a framelit that cuts cute little branches into the center of the tree. I forgot to be sure they were lifted up before I took the picture, but the effect is pretty cool.
Here's the inside of the card:
* * * * * * * * * *
I made a total of about eight cards this year, significantly less than I usually do, because I was struggling with carpel tunnel and pinched ulnar (elbow) nerves on both arms. At the time of this post, I've already had surgery on my left side and it is making a drastic improvement, and I await surgery on the right side with hopes that it will be equally successful. I'm told that the nerves in my hands and arms may take up to a year to regenerate, so I'm expecting to get a lot more done in 2016 with a lot less pain.
Up next: A small 3D project I made as a gift for a friend. I hope you'll be back to join me!
Warmest wishes to you for New Year! May it bring you much love, happiness, and creativity!
Smiles,
Joyce Spear, a.k.a. StamperJoyce
Sunday, November 8, 2015
Christmas Tags 2015
I've been a busy little bee for the last couple of weeks! I had surgery scheduled for November 9 and needed to finish the tag swap I signed up for in StampNation before going in. At the last minute I found out that the surgery will have to be rescheduled, but that just puts me ahead of the game as far as Christmas preparations.
(For those wondering, I have carpel tunnel in both wrists and pinched ulnar nerves in both elbows. It's painful, and it's making crafting challenging because I'm having a hard time holding on to things.)
The tags are pretty self-explanatory, so I'll let the pretty pictures do the work in this post. These first five photos show each tag front and back:
The rest of these pictures show just the front of the tags:
Thanks for looking!
Smiles,
Joyce Spear a.k.a. StamperJoyce
(For those wondering, I have carpel tunnel in both wrists and pinched ulnar nerves in both elbows. It's painful, and it's making crafting challenging because I'm having a hard time holding on to things.)
The tags are pretty self-explanatory, so I'll let the pretty pictures do the work in this post. These first five photos show each tag front and back:
The rest of these pictures show just the front of the tags:
Thanks for looking!
Smiles,
Joyce Spear a.k.a. StamperJoyce
Bird Crazy Thank You Cards
Like so many of my stamping buddies, I am smitten with the Stampers Anonymous Tim Holtz Collection stamp set called Bird Crazy... and the accessories, and the dies. (At least I haven't gotten the dies for the accessories...yet! or the coordinating sentiments.) But who can resist these birds' crazy expressions and hilarious body language?
Recently two of my dear friends, Carey and Kevin, gave me some amazing gifts, so I just HAD to do up some extra-special thank-you cards for them. I adore both of them for their warped sense of humor and felt the Birds would be perfect for them. I decided to make their cards "fraternal twins," i.e. make them at the same time using the same supplies, but changing up some of the details so they each would have a unique card.
Without further ado, here is Kevin's card:
and Carey's card:
I used my MISTI tool to stamp all the birds and accessories in Stampin' Up!'s archival black on white cardstock, then colored them in various colors with my Spectrum Aqua markers. I used my trusty dies to cut out the birds, then took my Cutter Bee scissors to fussy cut the rest.
As I was assembling, I realized that I had left the crazy birds floating in mid-air, so I created some grass for them to stand in.
By this time, (a week later, haha), the ink on the background panels was dry enough that I could safely heat emboss the words 'thanks so much' and 'you're amazing' at the top of them. Since I wanted the words to really POP! off the backgrounds, I used my MISTI to perfectly place them, inked the stamps several times with VersaMark ink, then used detail white embossing powder before applying heat to achieve the effect I was looking for.
I glued the grass directly on the card panel and attached the birds with Stampin' Dimensionals, bending the outside edges down to create a more 3D effect. When all the glues were dry, I adhered the panels onto a heavy white card base. As a special touch, I used Crystal Effects on the sunglasses.
I sat back to admire my work, but felt the cards weren't quite done. I thought to myself, "Sequins!" -- and a three-day search for my giant bag of sequins began. On day two I decided to take drastic measures to finish the cards, and ended up die cutting a bunch of teeny tiny circles out of glimmer paper to add in place of the sequins. In retrospect, I'm not so sure about the placement of them, and I think I may have added too many in some places. But overall, I'm pleased with how the cards turned out. Both Carey and Kevin indicated that they like their cards, too, which says a lot because they are both very talented crafters themselves!
--------------------------------------------------
Thanks for taking a look at my crazy Bird Crazy cards!
Coming up next: Christmas tags!
Happy Stamping,
Joyce Spear a.k.a. StamperJoyce
Recently two of my dear friends, Carey and Kevin, gave me some amazing gifts, so I just HAD to do up some extra-special thank-you cards for them. I adore both of them for their warped sense of humor and felt the Birds would be perfect for them. I decided to make their cards "fraternal twins," i.e. make them at the same time using the same supplies, but changing up some of the details so they each would have a unique card.
Without further ado, here is Kevin's card:
and Carey's card:
I started by doing the card backgrounds on Ranger's distress watercolor paper using distress inks and a blending tool. (I learned that I still suck at using a blending tool, so I either need more practice or more sponges to use instead.) I added a few water droplets and patted them off to create a watery effect, but felt more interest was needed. So I pulled out my stencils and and started blending in some contrasting colors - blue on purple, for example. The more color I added, the happier I got. When I was satisfied, I moved on to the birds.
I used my MISTI tool to stamp all the birds and accessories in Stampin' Up!'s archival black on white cardstock, then colored them in various colors with my Spectrum Aqua markers. I used my trusty dies to cut out the birds, then took my Cutter Bee scissors to fussy cut the rest.
As I was assembling, I realized that I had left the crazy birds floating in mid-air, so I created some grass for them to stand in.
By this time, (a week later, haha), the ink on the background panels was dry enough that I could safely heat emboss the words 'thanks so much' and 'you're amazing' at the top of them. Since I wanted the words to really POP! off the backgrounds, I used my MISTI to perfectly place them, inked the stamps several times with VersaMark ink, then used detail white embossing powder before applying heat to achieve the effect I was looking for.
I glued the grass directly on the card panel and attached the birds with Stampin' Dimensionals, bending the outside edges down to create a more 3D effect. When all the glues were dry, I adhered the panels onto a heavy white card base. As a special touch, I used Crystal Effects on the sunglasses.
I sat back to admire my work, but felt the cards weren't quite done. I thought to myself, "Sequins!" -- and a three-day search for my giant bag of sequins began. On day two I decided to take drastic measures to finish the cards, and ended up die cutting a bunch of teeny tiny circles out of glimmer paper to add in place of the sequins. In retrospect, I'm not so sure about the placement of them, and I think I may have added too many in some places. But overall, I'm pleased with how the cards turned out. Both Carey and Kevin indicated that they like their cards, too, which says a lot because they are both very talented crafters themselves!
--------------------------------------------------
Thanks for taking a look at my crazy Bird Crazy cards!
Coming up next: Christmas tags!
Happy Stamping,
Joyce Spear a.k.a. StamperJoyce
Tuesday, September 29, 2015
Wedding Card
A friend of mine asked me to create a wedding card for a couple who is getting married this week. Normally short deadlines lead me to stress, but somehow this card came together rather easily.
Except for the detail black embossing powder I used, this card is made entirely out of Stampin' Up! products. The sentiments are from the set called Something to Say.
I can't remember the last time I made a wedding card, or even IF I have ever made one, so I was happy when my friend said she really likes this card.
Sophisticated Smiles,
Joyce Spear a.k.a. StamperJoyce
Except for the detail black embossing powder I used, this card is made entirely out of Stampin' Up! products. The sentiments are from the set called Something to Say.
I can't remember the last time I made a wedding card, or even IF I have ever made one, so I was happy when my friend said she really likes this card.
Sophisticated Smiles,
Joyce Spear a.k.a. StamperJoyce
Saturday, September 26, 2015
Coloring with Crayons (and other things)
Over at StampNation this month one of our Dream Team members, Allison Cope, is teaching a class on coloring using all kinds of mediums from crayons and colored pencils and watercolor paints on up to Zig Clean Color Real Brush markers and Copics. She's sharing some color theory with us, but mostly she's encouraging us to experiment with the mediums we have in our homes already.
The first lesson was about crayons. It doesn't sound like much, but it actually was a fun class. We learned that because crayons are made of wax, they melt when heat is applied and can even be blended to produce new (and, in my case, sometimes ugly) colors.
In order to do the "homework" I had to dig out my crayons, and it turns out I have quite a few:
I won't bore you with my coloring/scribbles, but I do want to show a card I made using my Gel FX crayons. They show best on black, so I found an open flower stamp and stamped in black in on Basic Black cardstock, then traced over the stamped image with the neon crayons. I then fussy cut the individual flowers, curled the petals, and then placed them on a black panel with Stampin' Dimensionals. I added a few sequins and a smidge of Wink of Stella, and here's how it turned out:
Allison's month-long class is nearly done and I have a lot of homework to get caught up on if time allows. If I make cards with any of my "experiments" I'll be sure to post them here. In the meantime, never underestimate the power of a crayon!
Smiles,
Joyce Spear a.k.a. StamperJoyce
The first lesson was about crayons. It doesn't sound like much, but it actually was a fun class. We learned that because crayons are made of wax, they melt when heat is applied and can even be blended to produce new (and, in my case, sometimes ugly) colors.
In order to do the "homework" I had to dig out my crayons, and it turns out I have quite a few:
I won't bore you with my coloring/scribbles, but I do want to show a card I made using my Gel FX crayons. They show best on black, so I found an open flower stamp and stamped in black in on Basic Black cardstock, then traced over the stamped image with the neon crayons. I then fussy cut the individual flowers, curled the petals, and then placed them on a black panel with Stampin' Dimensionals. I added a few sequins and a smidge of Wink of Stella, and here's how it turned out:
Allison's month-long class is nearly done and I have a lot of homework to get caught up on if time allows. If I make cards with any of my "experiments" I'll be sure to post them here. In the meantime, never underestimate the power of a crayon!
Smiles,
Joyce Spear a.k.a. StamperJoyce
Subscribe to:
Posts (Atom)